Overview
- -----------------------------------------------------------
IES MASTER STUDIO
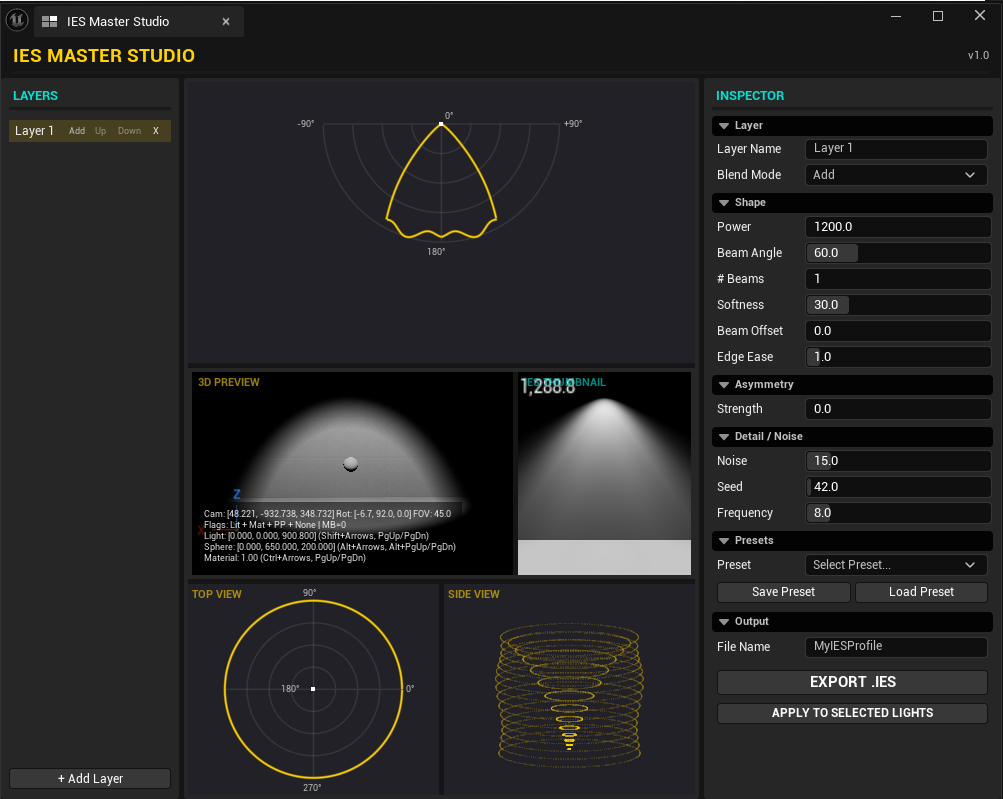
A procedural IES profile generator for Unreal Engine lighting. IES Master Studio lets lighting artists and technical artists build custom IES distributions from layered parameters, preview the result in 2D and 3D, export an .ies file, auto-import it as a Texture Light Profile, and optionally apply it to selected Point Light and Spot Light components.
KEY FEATURES
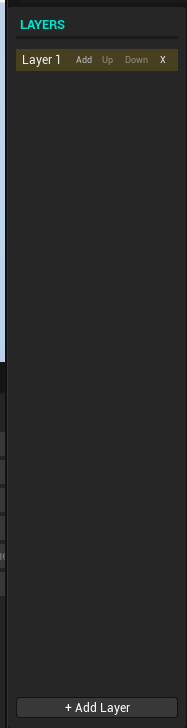
Layer based authoring
- Add, remove, and reorder layers.
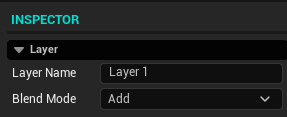
- Per-layer label and blend mode: Add, Subtract, Multiply, Max, Overlay.
Beam shaping controls (per layer)
- Power (Lumens).
- Beam Angle (Spread).
- Multi-beam output (# Beams) with Beam Offset (Split).
- Edge shaping with Softness and Edge Ease.
- Asymmetry Strength (directional bias by horizontal angle).
- Procedural detail via Noise, Seed, Frequency.
Preview and analysis
- 2D polar curve preview (vertical distribution curve).
- Top view preview (horizontal variation sampling).
- Side view preview (interactive point cloud, mouse drag rotation).
- Real time 3D preview scene with a preview Spot Light, basic geometry, and volumetric fog.
- Live thumbnail preview of the transient Texture Light Profile.
Presets
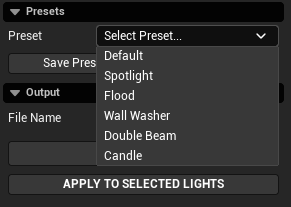
- Built-in presets: Default, Spotlight, Flood, Wall Washer, Double Beam, Candle.
- Save preset to JSON and load preset from JSON.
Export and application
- Export .ies to Project/Saved/IESExports.
- Auto-import to /Game/IESProfiles as Texture Light Profile.
- Apply the last imported profile to selected actors' Point Light and Spot Light components.
Performance considerations
- Parameter changes trigger preview recomputation:
- Polar preview: 721 samples (-180 to +180 at 0.5 degree steps).
- Top view preview: 360 samples (1 per degree).
- Side view preview: point cloud sampling with 180 horizontal slices and 2 degree vertical steps (filtered by an intensity threshold).
- 3D preview: rebuilds IES content and regenerates a transient Texture Light Profile.
- Recommended: keep layer count moderate and avoid extreme Noise values if you need smooth UI interaction.
INSTALLATION
- Install the plugin from Fab into your Unreal Engine project (or Engine plugins folder).
- Launch the project in Unreal Editor.
- Go to Edit > Plugins.
- Find IES Master Studio and enable it.
- Restart the editor when prompted.
HOW TO OPEN THE TOOL
Main menu: Window > IES Master Studio
WORKFLOW GUIDE
1) Open the tool and confirm the UI layout
2) Create and manage layers
Use + Add Layer to create a new layer. Click a layer to make it active. Use the per-layer controls to move a layer up/down or remove it.
3) Set the active layer blend mode
In the Inspector, choose a Blend Mode for how this layer combines with layers below it. Layer order matters: the first layer is the base; subsequent layers blend into it.
4) Shape the distribution (per layer)
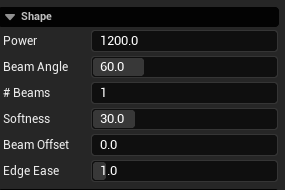
Adjust the Shape section: Power controls layer lumens. Beam Angle and Softness control spread and falloff. # Beams and Beam Offset create split or multi-peak beams. Edge Ease changes edge rolloff behavior.
6) Use the analytic previews to validate the profile
Polar preview verifies the vertical distribution curve. Top view verifies variation across horizontal angles. Side view is a point cloud representation; drag with left mouse to rotate.
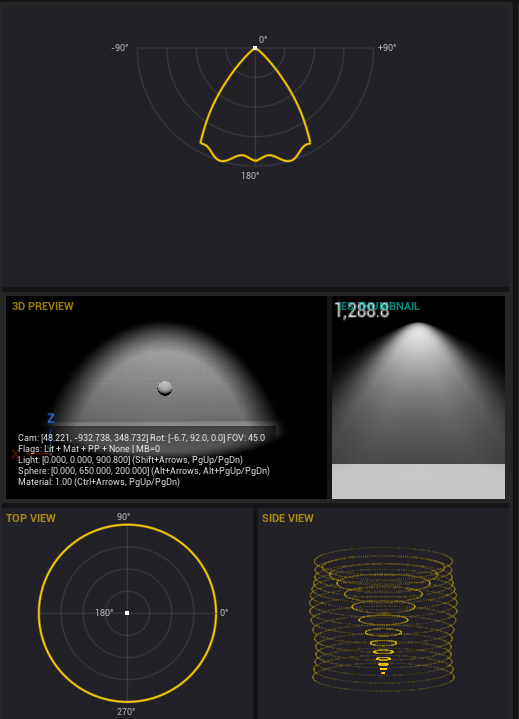
7) Validate in the real time 3D preview
The 3D preview scene uses a preview Spot Light plus basic geometry and volumetric fog to visualize the IES pattern.
- Click inside the viewport to focus it.
- Shift + Arrows / PageUp / PageDown: move the preview light.
- Alt + Arrows / Alt + PageUp / Alt + PageDown: move the target sphere (light look-at).
- Ctrl + Arrows / Ctrl + PageUp / Ctrl + PageDown: adjust preview material intensity scaling (visual aid).
8) Use presets or save/load a JSON preset
Select a built-in preset from the Presets dropdown to populate starting values. Use Save Preset to write a JSON file. Use Load Preset to restore a JSON file.
9) Export and import into the Content Browser
Set File Name in Output and click EXPORT .IES. The tool writes Project/Saved/IESExports/<FileName>.ies and then imports into /Game/IESProfiles/<FileName> as a Texture Light Profile.
10) Apply to selected lights
Select one or more actors in the level and click APPLY TO SELECTED LIGHTS. The tool assigns the last imported profile to all Point Light and Spot Light components on the selected actors and enables Use IES Brightness.
[SCREENSHOT PLACEHOLDER: Level viewport showing an applied IES pattern]
ADVANCED FEATURES
Layer blending behavior
The system computes a global normalization maximum by sampling combined intensities across 16 horizontal planes (0 to 337.5 degrees, 22.5 degree step) and 181 vertical angles (0 to 180). Multiply and Overlay modes use this normalization maximum to keep results stable across different lumen values.
Asymmetry implementation
Asymmetry shifts the evaluated vertical angle by a sinusoidal function of the horizontal angle, scaled by AsymmetryStrength. This can create directional distributions such as wall-wash style beams.
Preview vs exported behavior
3D preview creates a transient Texture Light Profile in memory and assigns it to the preview Spot Light. In preview, UseIESBrightness is disabled on the preview light and intensity is driven by the sum of layer lumens for predictable brightness. When applying to level lights, the tool enables UseIESBrightness on Point Light and Spot Light components.
LIMITATIONS
- Apply targets only UPointLightComponent and USpotLightComponent. Rect Light, Directional Light, and other light types are not handled.
- Assets are imported to /Game/IESProfiles. There is no UI to change the destination folder (inferred from a fixed import destination).
- Imported assets are not auto-saved. Save the asset manually if you want it persisted.
- Undo/Redo is not guaranteed because Apply does not wrap changes in a transaction or call Modify() on components.
- JSON presets expect specific fields. Missing fields can prevent loading.